


It's the 12th of March, time to get messy. (insert deer-in-the-headlight look) As you likely recall from previous 12ths, I am not one who likes messes. Not one bit. BUT a challenge is only a challenge if it stretches you, and I'm up for the Hot Mess Success Challenge.
Barb, Carol, Darlene, Terry, and I create cards for the Hot Mess Success challenge each month and share them on the 12th.
It's Anything Goes - as long as there is something messy involved.

However (don't you just hate that word?)... I cannot really take any credit. I saw a YouTube video showing how to add gilded flakes to paste to a stencil, to to to to... and I knew I had to try it. I honestly don't even remember how I found this YouTube video, since I very seldom practically never go to YouTube.
You can check out Cheri's Cards Gilded Texture video - HERE.
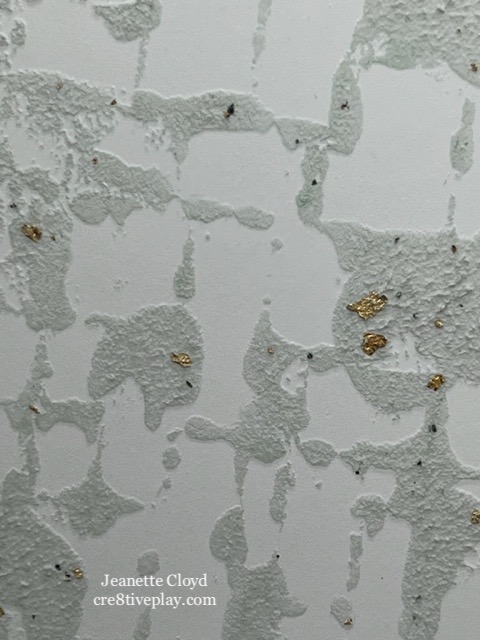
As per the instructions in the video, I mixed ink (Concord & 9th Dove) into embossing paste and added just a little bit of gilding flakes into the mix. I added the mixture to Concord & 9th Dove CS using the Rabbit Hole Drop It Stencil. I used the edge of the palette knife to rough up the paste some, too. After removing the stencil, I added some additional gilding flakes and gently pressed it into the wet paste.

I set both pieces aside to dry.
Once they were completely dry, I brushed off the excess gilding flakes from the original piece and then put my card together.


I also like the way the white piece turned out - it's MUCH more subtle, but still looks pretty cool. I've added it to my scrap file (altered papers drawer) and will use it at a future point.


Papers: Concord & 9th Dove, Hammermill 110# White (inside), and Recollections Black CS
Stencil: Rabbit Hole Drop It
Messy Medium: Dreamweaver Embossing Paste, Concord & 9th Dove Reinker, and Flocons Rainbow Flakes Gilding Flakes
Dies: MFT Stitched Rectangle
Embellishments: Amazon Diamond Dots


5 comments:
Oh my!! How great is this?? Pretty great, leet me assure you! I have yet to screw up my courage to try the gilding flakes. Your technique sounds very complicated...I think I need to start at the beginner level. But your card and extra panel are over-the-top!
Oh my goodness what a stunning result Jeanette on both the finished card AND the spare background - great idea to 'stamp' with the stencil and make another panel
Blessings
Maxine
Wow Jeanette. Indeed to try this. It is awesome!
Wow Jeanette. I need to try this. It is awesome!
WOWZA--your cards are so pretty. You are getting messier and more creative every month!
Post a Comment